 Save to Pinterest
 My cousin texted me three days before graduation asking if I could bring something to the backyard party, and my first instinct was to panic about cooking. Then it hit me that a snack board would be perfect—no oven time, just thoughtful arrangement and a little bit of color strategy. I spent an hour at the store picking out things that felt celebratory, and watching people's faces light up when they saw the board overflowing with choices made me realize this was exactly what the moment needed.
I remember my mom watching me arrange the first board and asking if I'd done this before because the way I'd grouped the colors together looked so intentional. The truth is I'd never done it before that day, but something about thinking of it like painting a picture instead of just placing food made the whole process feel less stressful and more fun. That's when I learned that snack boards are less about perfection and more about creating an experience where everyone feels welcome.
Ingredients
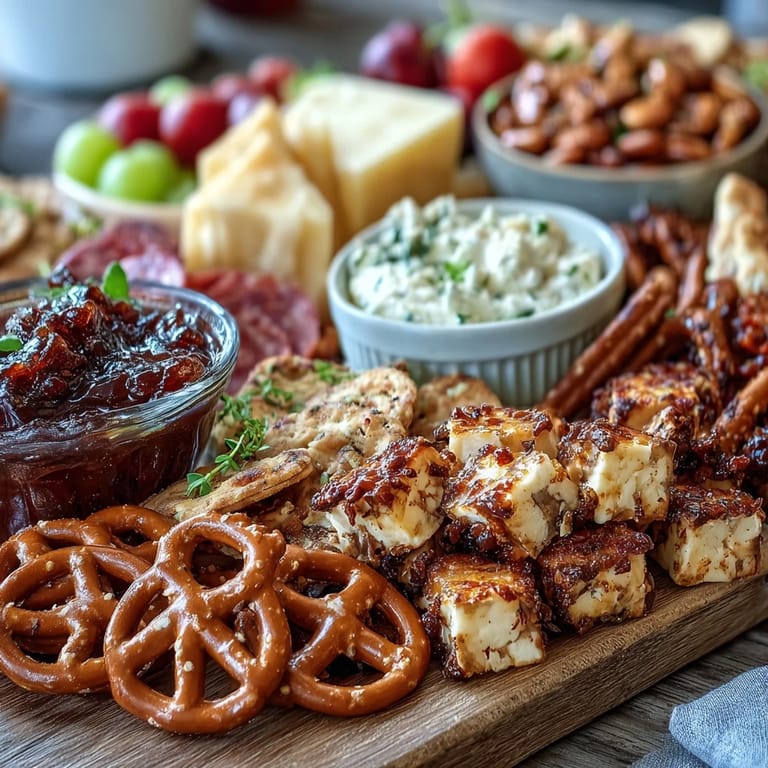
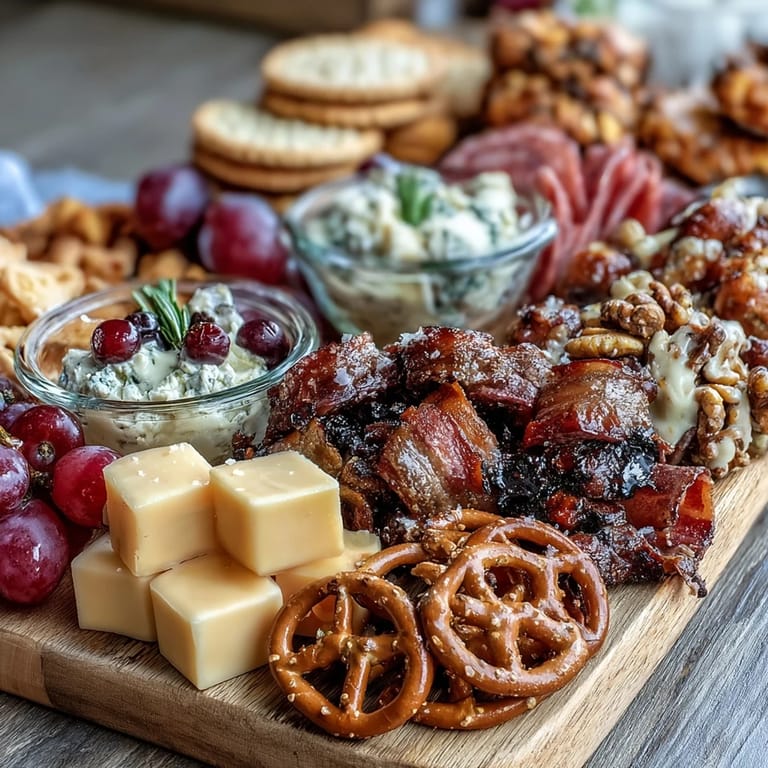
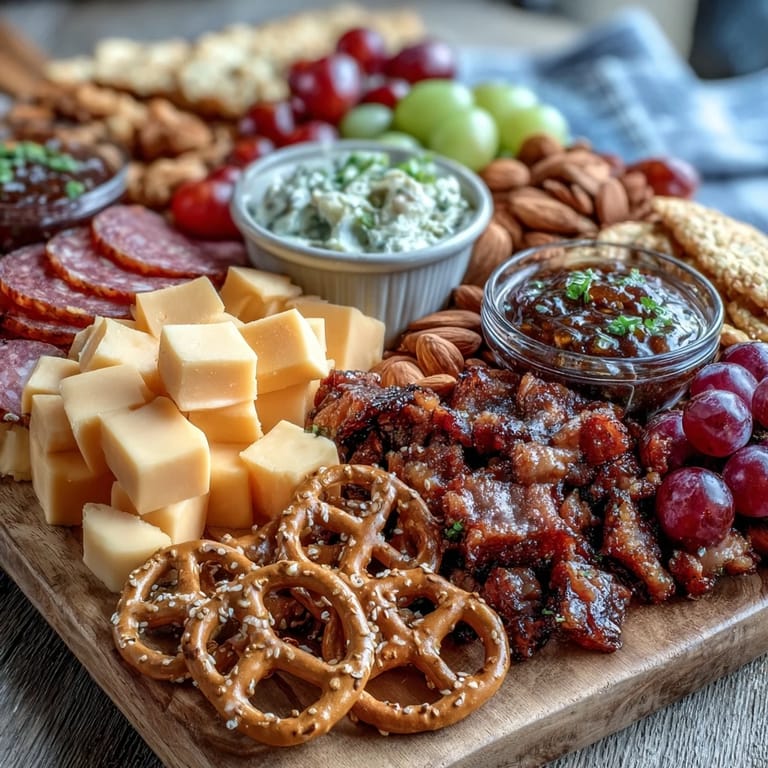
- Cheddar cheese cubes: Cut them fresh rather than buying pre-cubed if you can, because the texture holds up better and they look more intentional on the board.
- Salami slices: Roll some of them into little cylinders for visual interest and easier grabbing than flat slices.
- Turkey or ham roll-ups: These add protein without the saltiness overload that too much cured meat can bring to the board.
- Mixed olives: Buy them from a good deli counter if possible because jarred ones can taste a bit tinny, and the difference really matters when olives are the star.
- Roasted nuts: Lightly salted is your friend here; unsalted can feel bland next to the other salty items.
- Baby carrots and cherry tomatoes: These are your color workhorses and they stay fresh longer than most vegetables if you keep them in water until serving.
- Cucumber slices: Cut them just before assembly or they'll weep and make the board look soggy.
- Mini pretzels and crackers: Have more than you think you need because they disappear fastest, especially if there are kids at the party.
- Chocolate-covered pretzels: These bridge the sweet and savory worlds beautifully and add a grown-up vibe to the board.
- Fresh berries: Buy them a day or two before and don't wash them until you're ready to arrange, which keeps them from getting moldy too quickly.
- Grapes: Chill them for a few hours before the party so they feel refreshing and look dewy on the board.
- Mini cookies or macarons: Store-bought is totally fine and actually preferred here because they stay crispy and require zero effort.
- Dried apricots: They add a pop of color and a chewy sweetness that rounds out the sugary items nicely.
- Hummus and ranch dip: Make sure your dips are cold and fresh, and use good containers so they don't look sad sitting on the board.
- Honey or fruit preserves: Transfer these to small jars or bowls rather than serving from the original container for a polished look.
Tired of Takeout? 🥡
Get 10 meals you can make faster than delivery arrives. Seriously.
One email. No spam. Unsubscribe anytime.
Instructions
- Start with the anchor items:
- Place your dip bowls first because everything else will build around them, and they need breathing room so people can actually access them without knocking over cheese cubes.
- Build your savory foundation:
- Arrange cheeses, meats, olives, and nuts in loose clusters rather than perfect lines, which makes the board feel abundant and inviting. Leave some intentional gaps because you'll fill those with sweetness next.
- Add color with vegetables:
- Distribute carrots, tomatoes, and cucumbers throughout so no two same items sit side by side, which honestly just looks more visually interesting. The red and orange vegetables are your friends for making the whole thing pop.
- Scatter in the sweet elements:
- Weave berries, grapes, cookies, and chocolate pretzels between the savory items, thinking about how colors balance across the board. Step back every few moments to see what's looking sparse or crowded.
- Fill the remaining spaces:
- Toss in dried apricots, gummy candies, and any pretzels or crackers you haven't used yet, tucking them into the gaps like you're doing a puzzle. This final step is where the board goes from nice to spectacular.
- Serve with confidence:
- Set out small tongs or toothpicks nearby and let it sit at room temperature for no more than an hour before guests arrive, which keeps everything at its best. Refresh dips and refill any items that get demolished throughout the party.
 Save to Pinterest
 By the end of that graduation party, the board was mostly empty and people kept complimenting it like I'd spent hours cooking something elaborate. What actually stuck with me was watching a picky eater I'd never met before load up a plate with things she actually wanted to eat, rather than feeling awkward about what wasn't available for her. That's when I realized that snack boards aren't just about food—they're about creating space where everyone belongs.
The Art of Board Balance
The secret to a board that looks expensive and intentional is thinking about it in thirds: one third savory proteins and salty things, one third fresh vegetables and crunchy elements, and one third sweets. This ratio keeps people from filling up too fast on the salty stuff and makes sure there's something for every craving that pops up during a party. I've learned to lay out all my ingredients on the counter first before touching the board, which gives me time to see what colors I'm working with and spot any gaps in variety.
Make It Your Own
The beauty of a snack board is that it's genuinely impossible to mess up because you can theme it around whatever matters to you. Some people go Mediterranean with olives and feta, others go full American with smoked gouda and barbecue chips, and both versions are equally valid and equally delicious. The graduates at that party mentioned they loved that the board reflected thoughtfulness without being fussy, and honestly that's the whole goal.
Timing and Temperature Tips
Temperature is something I used to overlook until I noticed that room-temperature olives taste way better than cold ones, while grapes absolutely need to be chilled to feel refreshing. I now prep my vegetables earlier in the day and keep them cold until the last minute, then let the room-temperature items sit out while I chill the fruit, timing everything to come together about thirty minutes before guests arrive. This small attention to detail makes a real difference in how the board tastes and feels throughout the party.
- Chill grapes and berries for at least two hours before assembling so they stay fresh and juicy all evening.
- Let cheese sit out for fifteen minutes before arranging so it doesn't crack when people try to grab pieces.
- Prep all your vegetables in advance but don't cut anything except the cucumbers more than four hours ahead, which prevents oxidation and keeps colors vibrant.
 Save to Pinterest
 A snack board is one of those rare dishes that actually gets easier the more you make it, and honestly becomes something you look forward to putting together. Every time I set one up for a gathering now, I think about that graduation party and how happy it made people, which reminds me why food—even food that needs zero cooking—matters so much.
Recipe Questions & Answers
- → What savory items are included on the snack board?
The board features cheddar cheese cubes, salami, turkey or ham roll-ups, mixed olives, roasted nuts, baby carrots, cherry tomatoes, cucumber slices, mini pretzels, and assorted crackers.
- → How are sweet bites incorporated?
Sweet bites such as chocolate-covered pretzels, assorted berries, grapes, mini cookies or macarons, dried apricots, gummy candies, and yogurt-covered raisins are arranged in clusters for color and variety.
- → Are there dipping options provided?
Yes, the board includes dips and spreads like hummus, ranch dip or tzatziki, and honey or fruit preserves placed around the platter for easy access.
- → Can the board be customized for dietary preferences?
Absolutely, you can customize with vegetarian options, gluten-free crackers and pretzels, or your favorite cheeses and cured meats to suit different needs.
- → What tools are needed to serve the snack board?
A large serving board or platter, small bowls for dips and spreads, and utensils like small tongs or toothpicks make serving easy and hygienic.