 Save to Pinterest
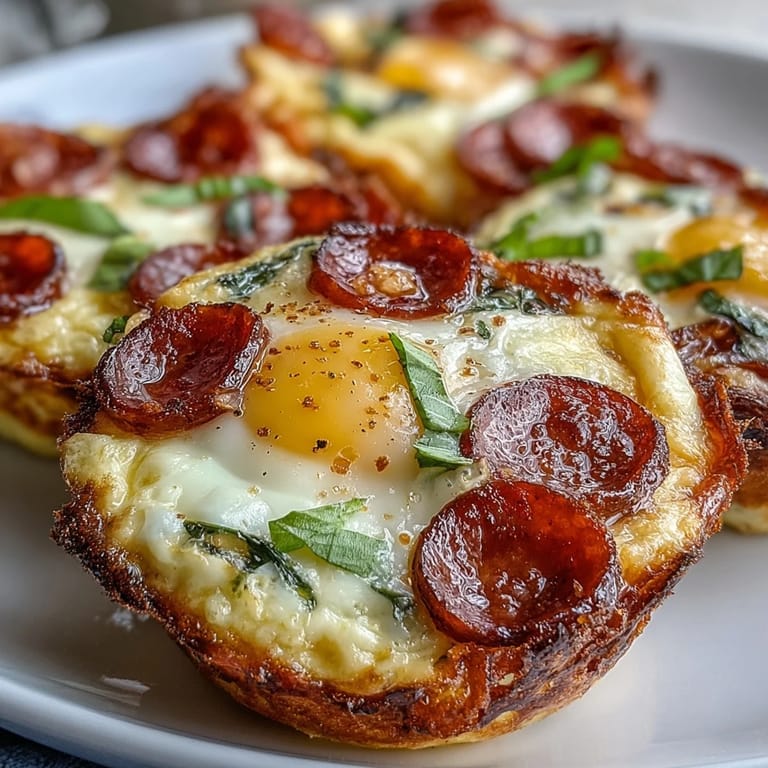
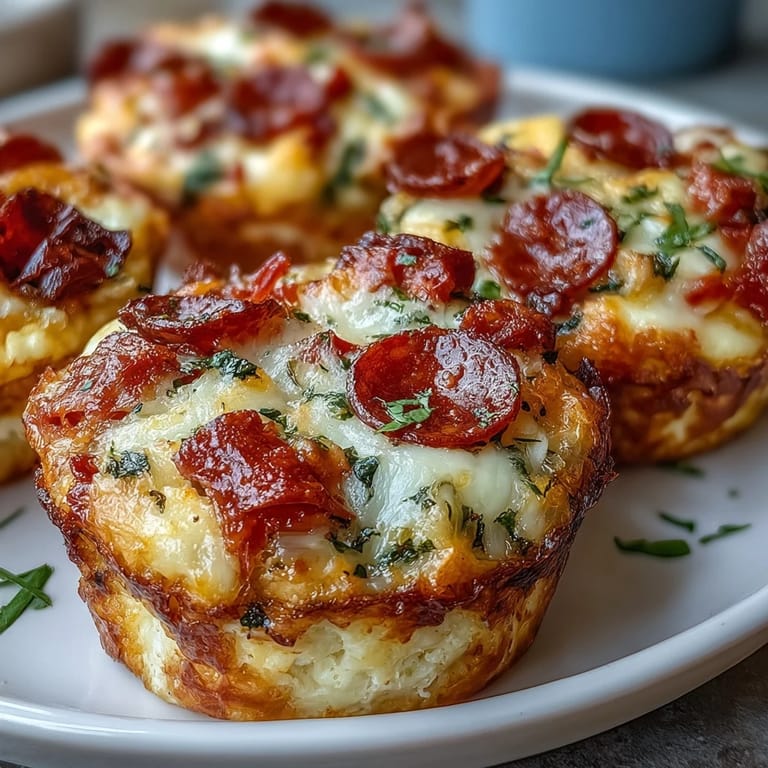
 One Tuesday morning, I stood in my kitchen staring at a container of Greek yogurt that seemed to mock my scrambled egg routine. I was tired of the same breakfast, tired of feeling rushed, and honestly tired of eggs that didn't stick with me past mid-morning. That's when it clicked: what if I treated breakfast like pizza? Savory, satisfying, portable. These pepperoni breakfast cups were born from that moment of kitchen rebellion, and now I make them every week.
I brought these to a friend's house for brunch last month, and watching people's faces light up when they bit into that golden, pepperoni-studded center reminded me why I cook. Someone asked if they were 'actually healthy,' and I got to smile and say yes while they reached for a third one. That small moment of feeding people something they genuinely wanted and felt good about eating is what keeps me making these.
Ingredients
- 6 large eggs: The base that holds everything together, and honestly, don't skip the size, as smaller eggs might not bind properly and your cups will fall apart in the muffin tin.
- 1/2 cup plain Greek yogurt (unsweetened): This is the secret that keeps them tender and adds protein without the wobble of regular milk alone, something I discovered by accident when Greek yogurt was all I had.
- 1/4 cup milk: Loosens the mixture just enough so it flows around your fillings and creates that custardy texture inside.
- 1/4 tsp salt and 1/4 tsp black pepper: Season as you mix, not after, so the flavors are woven in rather than sitting on top.
- 1/2 tsp dried oregano and 1/2 tsp dried basil: These are non-negotiable if you want that authentic pizza vibe without fresh herbs wilting in the oven.
- 3/4 cup shredded mozzarella cheese: Use whole milk mozzarella if you can, as it melts with more personality than the low-moisture version, and it will stretch just enough to hold everything together.
- 1/2 cup mini pepperoni slices: They don't need to be fancy, just distributed so every bite surprises you with a savory crunch.
- 1/4 cup finely diced red bell pepper: The sweetness cuts through the richness and adds a little color that makes people think you spent way more time on these than you actually did.
- 2 tbsp finely diced red onion: Small pieces matter here because large chunks turn sharp and overwhelming in the oven.
- 2 tbsp grated Parmesan cheese: Sprinkle it into the filling mix, not just on top, so it melts into the egg and creates those salty little pockets.
- 2 tbsp pizza sauce: Any brand works, but avoid anything labeled 'pasta sauce' because the flavor profile is completely different and I learned that the hard way.
Tired of Takeout? 🥡
Get 10 meals you can make faster than delivery arrives. Seriously.
One email. No spam. Unsubscribe anytime.
Instructions
- Heat your oven and prep the tin:
- Preheat to 375°F and grease your 6-cup muffin tin well or line it with silicone liners, which honestly changes the game for cleanup. I learned the hard way that even greased metal sticks sometimes, and nothing ruins a morning like a broken breakfast cup.
- Build the egg base:
- Whisk eggs, Greek yogurt, milk, salt, pepper, oregano, and basil in a bowl until the mixture is completely smooth and you don't see any yogurt streaks. This takes about a minute of actual whisking, and rushing it leaves you with chunks that won't cook evenly.
- Mix your pizza filling:
- In another bowl, toss mozzarella, pepperoni, bell pepper, red onion, Parmesan, and pizza sauce together just until everything is coated and friendly with each other. Don't overmix or you'll break up the pepperoni into tiny pieces and lose the visual appeal.
- Layer it in:
- Divide the filling evenly among the muffin cups, filling them about halfway so there's room for the egg mixture to settle in and create pockets. I use a small spoon and take my time here because uneven filling means some cups cook faster than others.
- Pour and swirl:
- Carefully pour the egg mixture over each cup until it's about 3/4 full, then use a fork to gently stir through each one so the filling gets distributed and nothing settles weirdly on the bottom. The egg should flow around the pepperoni like it's cradling it.
- Bake until golden:
- Slide into the oven for 18 to 20 minutes, watching for the moment when the tops turn pale gold and the centers barely jiggle when you nudge the tin. Overbaking dries them out, so set a timer and don't wander too far.
- Rest and serve:
- Let them cool for 5 minutes in the tin so they firm up enough to lift out without falling apart. Serve warm with extra pizza sauce on the side for dipping, because you'll want that sauce.
 Save to Pinterest
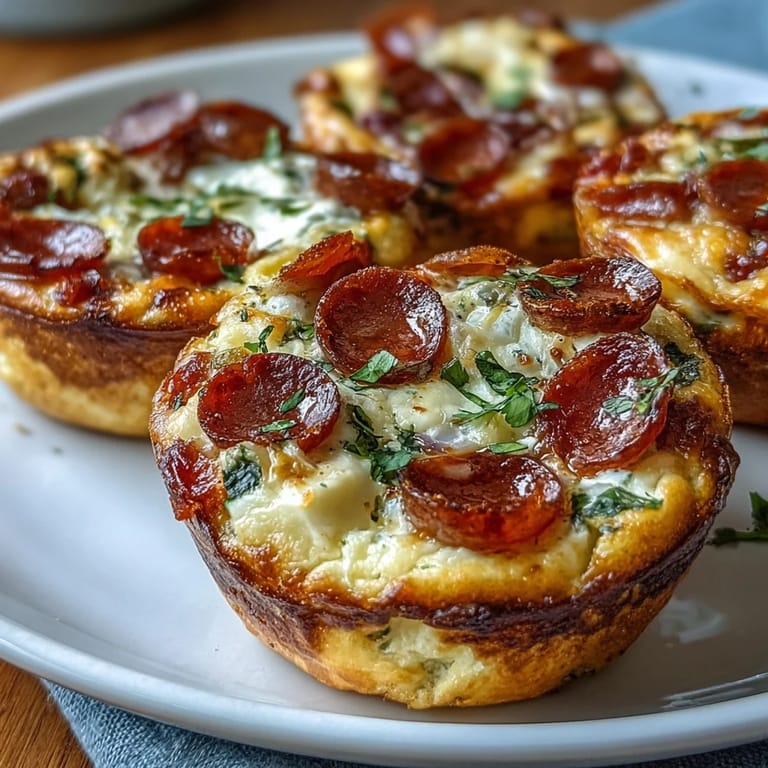
 My roommate came home one morning to find me eating one of these straight from the microwave while standing over the sink, and instead of looking at me like I'd lost my mind, she asked for one. We ate three together that morning, barely talking, just quiet contentment and the taste of something that felt like breakfast and pizza had made peace. That's when I knew I'd created something worth repeating.
Make-Ahead Magic
These are the breakfast equivalent of meal prep gold because you can bake a batch on Sunday and spend the rest of the week reaching into your fridge with zero guilt. I store mine in an airtight container and they stay fresh for up to four days, which means four mornings of not standing in front of the open fridge wondering what to eat. A quick 20-second spin in the microwave and they're soft and warm again, with the cheese getting slightly melty and the pepperoni warming through without getting rubbery if you don't overdo it.
Variations That Work
One weekend I had a craving to switch things up, so I grabbed some sautéed spinach and mushrooms instead of pepperoni and created a completely different breakfast that still hit the same comforting notes. The beauty of these cups is that they're flexible enough to accommodate whatever's in your fridge while still tasting intentional and delicious. You can swap cheddar or provolone for mozzarella, add jalapeños if you like heat, or even throw in a handful of diced sun-dried tomatoes for richness.
Perfect Pairing Ideas
These breakfast cups have taught me that the best meals are the ones you don't overthink, so I pair them with something simple: strong coffee, a glass of orange juice, or even just a piece of fruit on the side. The pizza flavors are bold enough to stand alone, but a light green salad with lemon dressing transforms breakfast into something that feels almost elegant if you're hosting someone. The cups work just as well at brunch, lunch, or even as a quick dinner when life gets hectic and you need protein fast.
- Serve them warm with hot sauce on the side if you like a little kick to wake you up.
- A simple arugula salad with olive oil and lemon juice balances the richness beautifully.
- Keep a jar of roasted red peppers nearby because they're a natural complement and add brightness.
 Save to Pinterest
 These breakfast cups remind me why I cook in the first place: to create something that makes morning feel less like an obligation and more like a small gift to myself. Grab one, pour your coffee, and let the day wait just a little bit longer.
Recipe Questions & Answers
- → Can I make these breakfast cups ahead of time?
Yes, these cups are excellent for meal prep. Store them in an airtight container in the refrigerator for up to 4 days. Reheat individual portions in the microwave for 30-60 seconds until warmed through.
- → What can I substitute for the pepperoni?
For a vegetarian version, try sautéed mushrooms, spinach, or sun-dried tomatoes. You could also use cooked crumbled sausage, bacon bits, or diced ham for different protein options.
- → Can I freeze these breakfast cups?
Yes, allow the cups to cool completely, then freeze them in a single layer before transferring to a freezer-safe bag. They'll keep for up to 3 months. Thaw overnight in the refrigerator before reheating.
- → Why use Greek yogurt in the egg mixture?
Greek yogurt adds extra protein and creates a creamy, tender texture in the baked custard. It also helps bind the ingredients together and adds a subtle tang that complements the savory pepperoni and cheese.
- → Can I double this recipe?
Absolutely. Use a standard 12-cup muffin tin and double all ingredients. The baking time remains the same at 18-20 minutes. This is perfect for larger families or batch cooking.
- → How do I know when the cups are done baking?
The centers should be just set with no liquid egg visible, and the tops should be lightly golden. They will continue to firm up slightly as they cool during the 5-minute resting period.