 Save to Pinterest
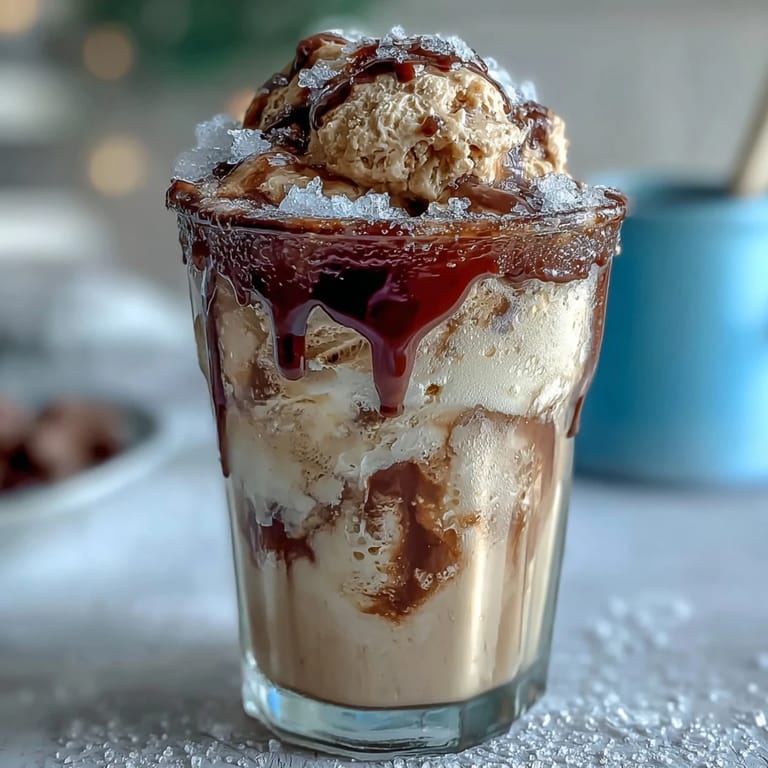
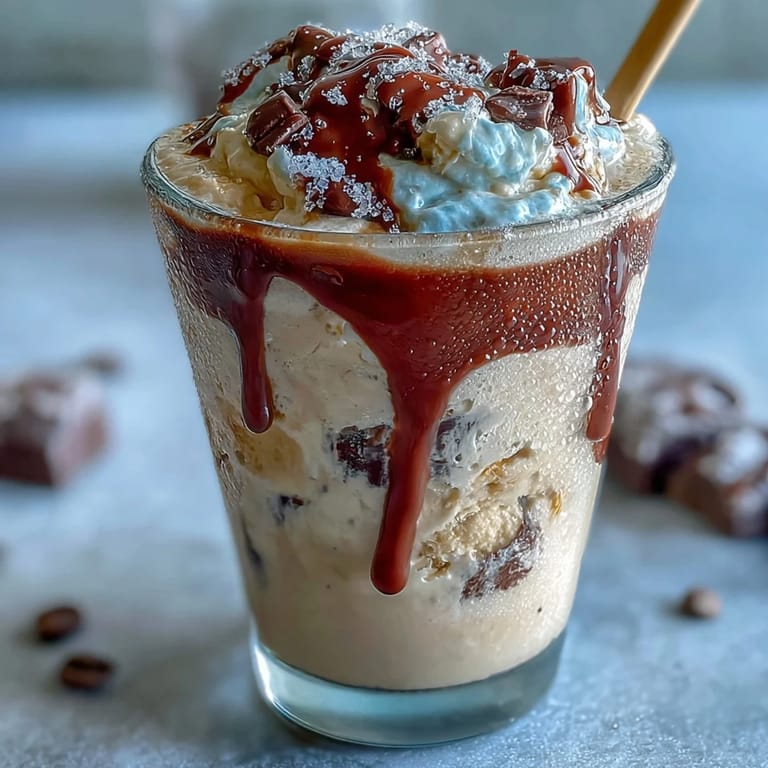
 My sister texted me a photo of an iced vanilla latte one sweltering afternoon, and I found myself staring at it for way too long, thinking about how perfect it would be as a frozen pop instead. That simple what-if moment led me to my kitchen on a weekend when the heat was just unbearable, and I spent the next few hours experimenting with vanilla bean and fudge layers until I had something that tasted like summer itself. These pops became the thing I made for every gathering after that, the kind of treat that makes people actually excited to see you arrive at a party.
I'll never forget watching my nephew's face light up when he bit into one of these for the first time, the fudge layer breaking through that creamy vanilla middle. He declared them better than anything from the coffee shop down the street, which meant everything coming from a kid who usually has very strong opinions about frozen treats. After that, making a batch became part of my summer routine, something I'd do in advance so there'd always be a few waiting in the freezer for those days when nothing else seemed to cool me down enough.
Ingredients
- Whole milk: The foundation that keeps these pops creamy rather than icy, and it balances the coffee without making things too heavy.
- Heavy cream: Half a cup goes into the base and another quarter cup melts into the fudge layer, creating that luxurious mouthfeel that makes these feel indulgent.
- Sweetened condensed milk: This is the secret to getting that silky texture and natural sweetness without the pops turning into solid ice blocks.
- Strong brewed espresso or coffee, cooled: Use something bold enough that you actually taste it even when frozen, otherwise it fades into the background.
- Vanilla bean or pure vanilla extract: If you can find a real vanilla bean, split it open and scrape those seeds into the mixture, the little black specks matter more than you'd think.
- Semisweet chocolate chips: Choose something you actually like eating plain, since that's what you're tasting in the fudge layer.
- Granulated sugar: Start with a quarter cup and taste as you go, adjusting based on how sweet your coffee and condensed milk already are.
Tired of Takeout? 🥡
Get 10 meals you can make faster than delivery arrives. Seriously.
One email. No spam. Unsubscribe anytime.
Instructions
- Combine the creamy coffee base:
- Whisk together your milk, heavy cream, sweetened condensed milk, cooled coffee, vanilla seeds or extract, and sugar in a bowl until everything feels smooth and unified. The mixture should smell like a vanilla latte and look like pale caramel.
- Melt the chocolate fudge layer:
- Combine chocolate chips with that quarter cup of heavy cream in a microwave-safe bowl and heat in short 20-second bursts, stirring between each one until everything melts into something glossy and pourable. Let it cool for a minute or two so it's warm enough to pour but not so hot it separates.
- Build the fudge foundation:
- Spoon about a teaspoon or two of the melted chocolate into the bottom of each popsicle mold, being generous but not so much that you run out before finishing all the molds. This layer is your surprise moment when someone bites into the pop.
- Fill with vanilla frappuccino:
- Pour or spoon the vanilla coffee mixture carefully over the fudge, filling each mold nearly to the top and watching the layers stay beautifully separated. Take a moment to admire how pretty they look before the next step.
- Freeze until solid:
- Insert your popsicle sticks and slide everything into the freezer for at least four hours, though overnight is honestly better if you can wait. Patience here means the difference between pops that fall apart when you eat them and ones that hold together perfectly.
- Release and enjoy:
- Run the outside of the molds under warm water for just a few seconds until you feel them loosen, then gently push them out from the bottom. Eat them immediately or wrap them in parchment if you want to store them, and watch them slowly melt on your tongue.
 Save to Pinterest
 There's something almost meditative about the moment when you first pull one of these from the freezer on a day when everything feels too warm and too much. The weight of it in your hand, the way the vanilla and coffee smell hits you before you even take a bite, and then that first taste where the cold creamy part meets the fudgy center, it's the kind of small comfort that shouldn't matter as much as it does but absolutely does.
Making It Your Own
I've played around with this recipe enough times to know where you can make it feel like your version instead of just mine. Some people want more coffee punch and less sweetness, others prefer their vanilla really bold and almost floral, and that's the beauty of making these yourself instead of buying them pre-made. The condensed milk amount stays the same because that's what gives you the texture, but everything else is yours to adjust until it tastes like summer in your kitchen.
Dairy-Free and Other Options
When my friend who's dairy-free mentioned wanting to try these, I realized coconut milk and coconut cream swap in beautifully without changing the soul of the recipe. The pops end up slightly less creamy but still silky, and the vanilla and coffee flavors actually sing a little louder because there's less richness competing for attention. I've also used oat milk with good results, though you lose just a tiny bit of that luxurious mouthfeel that makes these feel special.
Storage and Serving Smart
These keep in the freezer for at least two weeks wrapped in parchment, and honestly they taste better after a few days because the flavors meld together even while frozen. Pull one out about two minutes before you want to eat it if you like being able to taste the individual layers clearly, or eat it straight from the freezer if you prefer that almost-rock-solid experience. Here are the things I've learned about keeping them perfect:
- Wrap them individually in parchment or foil so they don't pick up freezer smells or get freezer burn.
- If you're making these for guests, pull them out about five minutes before serving so they're melting slightly and taste creamy rather than icy.
- Store them standing upright rather than lying down so they don't stick together and become one complicated frozen block.
 Save to Pinterest
 These vanilla bean frappuccino fudge pops are the answer to the question you didn't know you were asking on those afternoons when you need something cold and a little bit fancy but don't want to leave your house. Make them once and you'll find yourself making them constantly.
Recipe Questions & Answers
- → What coffee type works best for these pops?
Strong brewed espresso or coffee is ideal to provide a bold, rich flavor that complements the creamy vanilla base.
- → Can I make a dairy-free version?
Yes, substituting coconut milk and coconut cream creates a dairy-free alternative with a slightly tropical twist.
- → How do I achieve the marbled fudge effect?
After adding the fudge layer to the molds, gently swirl it with the vanilla mixture before freezing to create a marbled appearance.
- → What’s the best way to remove pops from molds?
Briefly run the mold’s exterior under warm water to loosen the pops without melting them.
- → How long should these pops freeze before serving?
Freeze for at least 4 hours or until completely solid to ensure the right texture.